
Disclosure: This post contains affiliate links. If you buy through them, we may earn a small commission at no extra cost to you. We only recommend products we have genuinely researched and tested. Prices and availability are accurate as of the publish date but may change.
Learning to Read Your Plants Will Change Everything
I used to lose indoor plants and have no idea why. A basil plant would yellow and die, and I’d shrug and start over. A lettuce crop would develop brown spots, and I’d assume it was just bad luck. It wasn’t until I learned to systematically read plant symptoms that my growing success rate jumped from about 50 percent to over 90 percent.
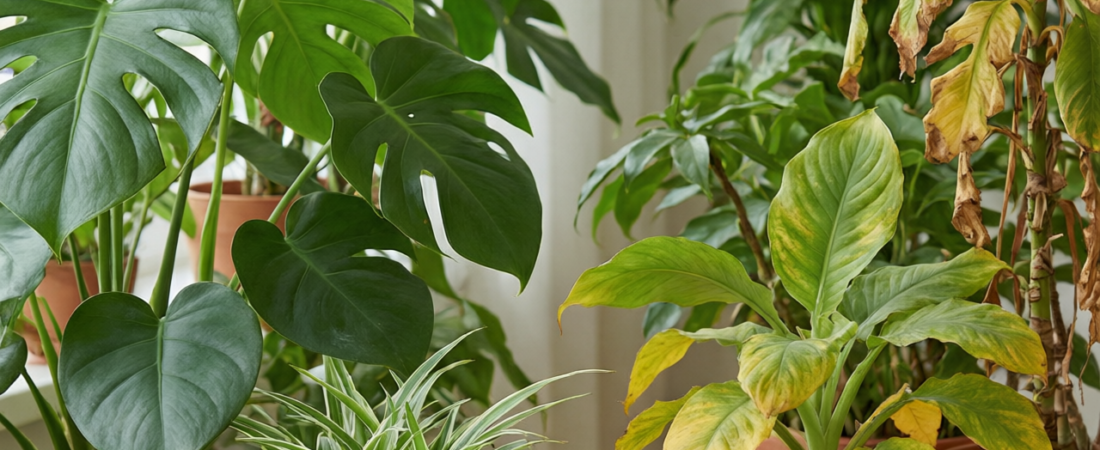
Plants can’t talk, but they communicate constantly through their leaves, stems, and roots. Yellowing tells you something different than browning. Spots on the top of a leaf mean something different than spots on the bottom. Curling edges communicate a different message than drooping stems. Once you learn this visual language, you can diagnose and fix most problems before they become fatal. This guide is my field-tested reference for every indoor growing situation, whether you’re growing in soil, a hydroponic system, or a smart garden.
How to Systematically Read Plant Symptoms
Before jumping to conclusions, I always follow this diagnostic sequence:, per University of Minnesota Extension.
- Which leaves are affected? Lower (older) leaves or upper (newer) leaves? This is the single most diagnostic clue. Mobile nutrients (nitrogen, phosphorus, potassium, magnesium) show deficiency on older leaves first because the plant moves them from old growth to new growth. Immobile nutrients (calcium, iron, boron) show deficiency on new growth first.
- What type of discoloration? Uniform yellowing, interveinal yellowing (veins stay green), browning, whitening, or purpling? Each points to different causes.
- What pattern? Random spots, edge burn, tip burn, mottling, or complete leaf change? The pattern narrows the possibilities.
- What’s the overall plant behavior? Wilting, stunting, stretching, or normal growth with localized symptoms?
- Check the environment: Light level, watering frequency, temperature, humidity, and any recent changes to your routine.
Nutrient Deficiencies: Visual Identification
Nutrient deficiencies are the most common indoor plant problem, especially in hydroponic systems. Here’s how to identify the big six, based on thousands of plants I’ve grown and diagnosed. For a complete nutrient management guide, see our hydroponic nutrients guide for beginners.
Nitrogen Deficiency
What it looks like: Older (lower) leaves turn pale green, then uniformly yellow. The yellowing progresses upward as the deficiency worsens. Plants are stunted and thin. In severe cases, lower leaves die and drop off. Stems may develop a purple tint.
Why it happens: Nitrogen is the most commonly deficient nutrient because plants use it in large quantities and it’s highly mobile (easily leached from soil). In hydroponics, it usually means nutrient concentration is too low or the nutrient formulation is weak.
The fix: Increase nutrient concentration by 25 percent. In soil, apply a balanced liquid fertilizer (10-10-10 or similar) at full strength. In hydroponics, check EC and increase to the recommended level for your crop’s growth stage. Recovery should be visible within 3 to 5 days.
Phosphorus Deficiency
What it looks like: Older leaves develop a dark, dull green or bluish-green color with purple or reddish undersides and stems. Growth is severely stunted. Leaves may curl downward. In advanced stages, older leaves turn dark brown and die.
Why it happens: Phosphorus is less available at pH below 5.0 and above 7.0. Cold root zone temperatures also reduce phosphorus uptake. In hydroponics, pH drift is the most common cause.
The fix: Check pH first. If pH is outside the 5.5 to 6.5 range, adjust it before adding more phosphorus. If pH is fine, increase phosphorus-containing nutrients. In soil, add bone meal or rock phosphate as a slow-release source.
Potassium Deficiency
What it looks like: Leaf edges and tips turn yellow, then brown and crispy (marginal necrosis). The browning starts at the leaf tip and edges and works inward. Older leaves show symptoms first. Plants may wilt easily and have weak stems. Fruit development is poor.
Why it happens: Potassium is used in large quantities, especially during flowering and fruiting. It’s also easily leached from soil. In hydroponics, potassium can be antagonized by excess calcium or magnesium.
The fix: Add a potassium-rich supplement. In hydroponics, increase the bloom nutrient component. In soil, apply potassium sulfate or wood ash. Watch for improvement at the leaf edges within 5 to 7 days (existing damage won’t heal, but new growth will be healthy).
Calcium Deficiency
What it looks like: New leaves and growing tips are distorted, cupped, or crinkled. Leaf tips may turn brown and die back (tip burn). In tomatoes and peppers, blossom end rot (a dark, sunken spot on the bottom of the fruit) is the classic sign. New growth may appear stunted or blackened.
Why it happens: Calcium is immobile in the plant, so deficiency shows on new growth first. It’s often not a lack of calcium in the medium but a transport issue caused by low humidity, inconsistent watering, or pH below 5.5. Fast-growing plants in low-humidity environments are most susceptible.
The fix: Increase humidity around the plant to 50 to 60 percent. Ensure consistent watering; calcium moves with water through the plant. Check pH; calcium is best absorbed above 6.0. In hydroponics, add a Cal-Mag supplement. Foliar spraying with a diluted calcium chloride solution can provide quick relief for new growth.
Magnesium Deficiency
What it looks like: Interveinal chlorosis on older leaves; the tissue between leaf veins turns yellow while the veins themselves stay green. In severe cases, the yellowed areas turn brown and die. Leaves may curl upward at the edges. This is one of the easiest deficiencies to identify visually.
Why it happens: Magnesium is often present but unavailable due to excess potassium or calcium competing for root uptake (cation antagonism). It’s also less available at pH below 5.5. Very common in hydroponics, especially with LED grow lights that drive rapid growth.
The fix: Foliar spray with Epsom salt (magnesium sulfate) at 1 tablespoon per gallon of water. This bypasses the root uptake issue and shows results within 2 to 3 days. For a longer-term fix, check pH and reduce potassium if it’s excessively high. Adding a Cal-Mag supplement to your regular nutrient regimen prevents recurrence.
Iron Deficiency
What it looks like: Interveinal chlorosis on new growth (the opposite pattern of magnesium). New leaves emerge pale yellow or almost white between the veins, while the veins stay green. In severe cases, the entire new leaf turns white and growth stops.
Why it happens: Iron becomes unavailable above pH 6.5. It’s extremely common in hydroponics where pH drifts upward. Also occurs with excess manganese or phosphorus, which chemically bind iron and make it insoluble.
The fix: Lower pH to 5.5 to 6.0, where iron is most available. This alone often resolves the problem without adding more iron. If pH adjustment doesn’t fix it within a week, add an iron chelate supplement (DTPA chelate is most effective in hydroponics at pH 5.5 to 6.5).
Pest Problems: Identification and Organic Treatment
Indoor plants aren’t immune to pests, though the problems are different from outdoor gardens. Here are the four most common indoor pests I encounter and how to deal with them organically., following Penn State Extension.
Aphids
Identification: Small (1 to 3 mm), pear-shaped insects clustered on new growth and the undersides of leaves. They come in green, black, red, or white. You’ll see a sticky residue (honeydew) on leaves below the infestation, which can lead to black sooty mold.
Organic treatment: Spray with insecticidal soap (Safer Brand Insect Killing Soap, about $8) or neem oil solution (1 teaspoon neem oil plus 1/2 teaspoon dish soap per quart of water). Apply to all leaf surfaces, especially undersides. Repeat every 3 to 4 days for two weeks. For severe infestations, introduce ladybugs (available online) as biological control.
Spider Mites
Identification: Tiny (barely visible) mites that cause stippling; tiny yellow or white dots on the upper leaf surface. In heavy infestations, you’ll see fine silk webbing between leaves and stems. Leaves eventually turn bronze, dry out, and die. Spider mites thrive in hot, dry conditions and are the hardest indoor pest to eliminate.
Organic treatment: Increase humidity above 50 percent (mites hate humidity). Spray with neem oil or a miticide like Captain Jack’s Dead Bug Brew (spinosad-based, about $12). Wipe leaves with a damp cloth to physically remove mites. For stubborn infestations, introduce predatory mites (Phytoseiulus persimilis). Treat every 3 days for at least three weeks to break the egg cycle.
Fungus Gnats
Identification: Small black flies that buzz around the soil surface and fly up when you water. The adults are annoying but mostly harmless; the real damage is done by the larvae in the soil, which feed on root hairs and can stunt or kill seedlings.
Organic treatment: Let the top 1 to 2 inches of soil dry out between waterings (larvae need moist soil to survive). Place yellow sticky cards near the soil surface to trap adults. Water with a solution of hydrogen peroxide (1 part 3% H2O2 to 4 parts water) to kill larvae in the soil. Apply Bti (Bacillus thuringiensis israelensis) as Mosquito Bits ($10) soaked in water and used for watering. This is the most effective biological control.
Whiteflies
Identification: Small white moths that fly up in a cloud when you disturb the plant. They congregate on leaf undersides, where you’ll also find tiny white scale-like eggs and nymphs. Like aphids, they produce honeydew and can transmit plant viruses.
Organic treatment: Use yellow sticky traps to monitor and reduce adult populations. Spray with insecticidal soap or neem oil, focusing on leaf undersides. Introduce Encarsia formosa parasitic wasps for greenhouse or large grow room infestations. Vacuum adult whiteflies with a handheld vacuum in the early morning when they’re sluggish.
Disease Issues
Powdery Mildew
Identification: White, powdery spots on leaf surfaces, usually starting on older leaves. Spreads to cover entire leaves, which then yellow and die. Thrives in high humidity (above 70%) with poor airflow.
Treatment: Remove severely affected leaves. Spray with a solution of 1 tablespoon baking soda plus 1/2 teaspoon liquid soap per gallon of water. Commercial options include GreenCure fungicide ($15) or Serenade Garden (Bacillus subtilis-based, $12). Improve airflow with a fan and reduce humidity. For herb growing tips, see our guide on growing herbs indoors without sunlight, which covers airflow management.
Root Rot
Identification: Roots turn brown, mushy, and smell foul (healthy roots are white or cream-colored). Above ground, plants wilt despite moist soil, yellow from the bottom up, and show stunted growth. In hydroponics, roots develop a slimy coating.
Treatment: In soil, immediately reduce watering and improve drainage. Remove the plant, trim brown roots, and repot in fresh, well-draining medium. In hydroponics, trim dead roots, add beneficial bacteria (Hydroguard or Aquashield), increase aeration, and ensure water temperature stays below 72 degrees Fahrenheit. Prevention is always easier than cure: don’t overwater, use well-draining media, and keep hydroponic reservoirs clean and cool.
Damping-Off
Identification: Seedlings suddenly topple over at the soil line, which appears pinched and water-soaked. Can kill an entire tray of seedlings in 24 to 48 hours. Caused by soil-borne fungi (Pythium, Rhizoctonia).
Treatment: There is no cure once damping-off appears; affected seedlings are lost. Focus on prevention: use sterile seed starting mix, don’t overwater, provide good airflow, and sprinkle cinnamon powder on the soil surface. If a tray is affected, immediately remove all diseased seedlings and treat remaining ones with a dilute hydrogen peroxide spray at the soil line.
Environmental Problems
Too Much Light
Symptoms: Leaves bleach out (pale or white patches), develop crispy brown edges, curl downward or away from the light, and may appear sunburned. Growth may actually slow as the plant expends energy on protective mechanisms.
Fix: Raise the light source 2 to 4 inches farther from the canopy. Reduce light duration from 16 to 12 hours. If using adjustable-intensity LEDs, lower the output by 25 percent.
Too Little Light
Symptoms: Plants stretch toward the light source (etiolation). Stems are long, thin, and weak. Leaves are small, pale, and widely spaced. Lower leaves drop off. Plants may lean dramatically to one side.
Fix: Move the light closer (2 to 4 inches above the canopy for seedlings, 6 to 12 inches for mature plants). Increase light duration to 14 to 16 hours. Upgrade to a more powerful light fixture. For lighting options, see our LED grow light guide.
Overwatering
Symptoms: Leaves yellow uniformly (not just edges or veins), feel soft and limp rather than crispy. Soil stays constantly wet. Roots may smell sour. Fungus gnats often accompany overwatering. Growth is slow and plants look generally unhappy despite “plenty of water.”
Fix: Allow the top 1 to 2 inches of soil to dry between waterings. Ensure pots have drainage holes and aren’t sitting in water. Use a well-draining potting mix with perlite. In hydroponics, ensure the growing medium isn’t waterlogged; roots need an air-water interface.
Underwatering
Symptoms: Leaves wilt and droop, feel crispy and dry. Leaf edges curl and turn brown. Soil pulls away from the pot edges. Plants recover quickly after watering (within hours), unlike root rot damage.
Fix: Water more frequently or increase the amount per watering. For severely dry plants, bottom-water by setting the pot in a tray of water for 30 minutes to rehydrate the medium evenly. Consider a self-watering pot or drip irrigation for consistent moisture.
Temperature Stress
Symptoms: Too hot: leaves curl upward, edges brown and dry, plants wilt in the afternoon. Too cold: leaves develop purple or reddish tints, growth stalls, lower leaves yellow and drop. Sudden temperature changes (cold drafts) cause leaf drop without other symptoms.
Fix: Maintain temperatures between 65 and 78 degrees Fahrenheit for most indoor plants. Keep plants away from heating vents, air conditioners, and drafty windows. Use a small space heater or heat mat in cold environments. Add a circulation fan in hot environments.
Quick-Reference Symptom Table
| Symptom | Most Likely Cause | Quick Fix |
|---|---|---|
| Lower leaves uniformly yellow | Nitrogen deficiency or overwatering | Check watering; increase nutrients |
| Leaf edges brown and crispy | Potassium deficiency or low humidity | Add potassium; increase humidity |
| New leaves yellow between veins | Iron deficiency (high pH) | Lower pH to 5.5 to 6.0 |
| Old leaves yellow between veins | Magnesium deficiency | Foliar spray Epsom salt solution |
| New leaves distorted/crinkled | Calcium deficiency | Add Cal-Mag; increase humidity |
| White powder on leaves | Powdery mildew | Baking soda spray; improve airflow |
| Sticky residue + small insects | Aphids or whiteflies | Insecticidal soap or neem oil |
| Fine webbing + stippled leaves | Spider mites | Neem oil; increase humidity |
| Small flies around soil | Fungus gnats | Dry soil surface; Bti treatment |
| Brown slimy roots + wilting | Root rot | Reduce water; add beneficial bacteria |
| Leggy stretched growth | Insufficient light | Move light closer; increase duration |
| Leached/bleached leaf patches | Too much light | Raise light; reduce duration |
| Leaves curling upward | Heat stress or too much light | Lower temperature; raise light |
| Purple tint on leaves/stems | Phosphorus deficiency or cold | Check pH; increase temperature |
Prevention Routine: Your Weekly Checklist
The best treatment is prevention. Here’s the 10-minute weekly routine I follow for every indoor garden setup:
- Visual inspection (3 minutes): Look at every plant from top to bottom. Check upper and lower leaf surfaces. Look for discoloration, spots, insects, webbing, or unusual growth patterns.
- Check growing medium moisture (1 minute): Stick your finger 1 inch into the soil. If it’s dry, water. If it’s wet, wait. In hydroponics, check reservoir water level and clarity.
- Check pH and nutrients (2 minutes, hydroponics only): Test pH and EC. Adjust if outside target range. For a complete pH management guide, see our hydroponic nutrients guide.
- Inspect environment (2 minutes): Is the light at the correct distance? Is the temperature in range? Is there adequate airflow? Are there any new light leaks or draft sources?
- Yellow sticky card check (1 minute): Check yellow sticky traps for insect activity. A few fungus gnats are normal. An increasing number signals a growing problem.
- Clean up (1 minute): Remove any dead leaves, fallen debris, or algae from the growing area. Clean surroundings prevent pest harboring and disease spread.
Organic Pest Control Options for Indoor Gardens
I avoid synthetic pesticides indoors because the enclosed environment concentrates chemicals and there are no beneficial outdoor insects to protect. Here are the organic products I keep on hand:
- Neem oil (cold-pressed): The most versatile organic treatment. Effective against aphids, spider mites, whiteflies, and fungal issues. Mix 1 to 2 teaspoons per quart of water with a few drops of dish soap as an emulsifier. Spray all leaf surfaces. Avoid spraying under intense light to prevent leaf burn.
- Insecticidal soap (potassium salts of fatty acids): Contact killer for soft-bodied insects. Safer Brand Insect Killing Soap is widely available. Spray directly on pests; it has no residual effect, so repeat applications are needed.
- Spinosad: A natural bacterial fermentation product effective against caterpillars, thrips, and leaf miners. Captain Jack’s Dead Bug Brew is the home gardener version. Spray or drench. Very safe for humans and pets.
- Bti (Bacillus thuringiensis israelensis): Targets fly and gnat larvae specifically. Mosquito Bits soaked in watering water is the easiest application. Completely safe for plants, pets, and humans.
- Hydrogen peroxide (3%): Kills fungal spores and gnat larvae on contact. Mix 1 part peroxide to 4 parts water and use as a soil drench. Also helps oxygenate root zones.
- Beneficial insects: Ladybugs (aphids), predatory mites (spider mites), and Encarsia formosa wasps (whiteflies) can be introduced in larger indoor grow spaces. They provide ongoing biological control without chemicals.
When to Save vs. When to Discard
Not every sick plant is worth saving. Here’s my decision framework after years of indoor growing:
Save the Plant If:
- The problem is nutritional (deficiency or excess); these are almost always reversible once you correct the cause.
- The problem is environmental (light, water, temperature); adjusting the conditions usually fixes things within a week.
- The pest infestation is light to moderate and you caught it early.
- The plant still has healthy new growth at the top, even if lower leaves are damaged.
- The root system is at least 50 percent healthy (white/cream colored).
Discard the Plant If:
- Root rot has destroyed more than 75 percent of the root system.
- A viral infection is suspected (mosaic patterns, stunted growth, deformed leaves; viruses have no cure and spread to other plants).
- A severe pest infestation has persisted for more than three weeks despite treatment (the population is likely resistant or the plant is too weakened to recover).
- Damping-off has killed seedlings; remove them immediately to protect nearby seedlings.
- The plant is a short-lived crop (lettuce, basil) that can be re-seeded quickly and easily.
When discarding, seal the plant in a bag before removing it from the grow area to prevent spreading pests or spores. Clean the pot with a 10% bleach solution before reusing.
Final Thoughts
Every indoor gardener loses plants. It’s not a sign of failure; it’s part of the learning process. The difference between beginners and experienced growers isn’t that experienced growers never have problems; it’s that they catch problems early, diagnose them accurately, and respond quickly.
Keep this guide handy as a reference. The next time you see yellowing leaves or brown spots, work through the diagnostic steps before reaching for a treatment. Most indoor plant problems have straightforward solutions once you understand what the plant is trying to tell you.
Start with the weekly prevention checklist. That 10-minute routine will catch 80 percent of problems before they become serious. And remember: it’s always cheaper and easier to prevent a problem than to cure one. Consistent care, clean growing conditions, and attentive observation are the three pillars of healthy indoor plants. Master those, and you’ll spend less time troubleshooting and more time harvesting. For a complete growing setup, explore our guides on starting an indoor vegetable garden and building a year-round growing system.
Frequently Asked Questions
How do I tell if my indoor plant is overwatered or underwatered?
Overwatered plants show yellowing lower leaves, soft mushy stems, and consistently wet soil. Underwatered plants show dry crispy leaf edges, drooping that recovers after watering, and soil that pulls away from the pot. Always check soil moisture with your finger before watering.
What causes brown leaf tips on indoor plants?
Brown tips are usually caused by low humidity, salt buildup from fertilizer, or inconsistent watering. Tap water with high fluoride or chlorine can also contribute. Using distilled water and leaching the soil monthly typically resolves the issue.
Why are my indoor plant leaves turning yellow?
Yellowing can stem from overwatering, nutrient deficiency (especially nitrogen), insufficient light, or root-bound conditions. The pattern matters: uniform yellowing suggests nutrition or light issues, while lower-leaf yellowing with wet soil points to overwatering.