Disclosure: This post contains affiliate links. If you buy through them, we may earn a small commission at no extra cost to you. We only recommend products we have genuinely researched and tested. Prices and availability are accurate as of the publish date but may change.
How to Start an Indoor Vegetable Garden: Step-by-Step Guide
You do not need a backyard to grow vegetables. I have been growing tomatoes, peppers, lettuce, and herbs in my apartment for two years, and the process is simpler than most people think. This guide walks you through every step from choosing your space to harvesting your first meal.
Step 1: Choose Your Growing Space
You need at least 2 feet of counter or shelf space near a power outlet. A south-facing window is ideal, but if you do not have natural light, grow lights work perfectly. I grow most of my vegetables on a simple wire shelf in my kitchen.
Light Requirements
Most vegetables need 6-8 hours of direct light per day. The Penn State Extension notes that light intensity and duration are the biggest factors limiting indoor plant growth, which matches what I have seen year-round. A south-facing window provides this in spring and summer, but in winter or north-facing rooms, you will need supplemental grow lights. I recommend a full-spectrum LED panel with at least 20 watts for a 2-foot growing area. For my detailed testing of affordable options, see my guide to the best LED grow lights for indoor herbs.
If you are relying on natural light, watch for these signs your plants need more: leggy or stretched stems, pale yellow leaves, slow growth, and plants leaning heavily toward the window. Any of these symptoms mean it is time to add a grow light.
Temperature and Humidity
Most indoor vegetables thrive between 65-75°F (18-24°C), which conveniently matches typical indoor temperatures. Leafy greens like lettuce and spinach prefer the cooler end of that range (60-70°F), while tomatoes and peppers prefer 70-80°F. Keep plants away from heating vents, air conditioning drafts, and cold window drafts in winter.
Humidity matters more than most beginners realize. Most homes run 30-40% humidity in winter, but vegetables prefer 40-60%. If your leaf tips are browning and crispy, humidity is too low. A simple $15 USB humidifier near your plants solves this, or place your pots on a tray filled with pebbles and water to create a humidity tray.
Step 2: Selecting Containers and Soil
Container Recommendations
Container size directly affects how well your plants grow. Research from the University of Minnesota Extension confirms that inadequate root space is one of the most common reasons container vegetables underperform. Here are my specific recommendations based on two years of testing:
| Vegetable | Minimum Pot Size | Recommended Pot Type | Drainage Needed |
|---|---|---|---|
| Lettuce and Spinach | 6 inches deep, 8 inches wide | Shallow wide pot or window box | Yes |
| Herbs (basil, mint, cilantro) | 6-8 inches deep | Standard 6-inch pot | Yes |
| Cherry Tomatoes | 12 inches deep, 12 inches wide | 5-gallon fabric pot | Yes |
| Peppers | 10 inches deep, 10 inches wide | 3-gallon pot | Yes |
| Microgreens | 2 inches deep | 10×20 seedling tray | Drainage holes |
I specifically recommend fabric pots for tomatoes and peppers because they air-prune roots, preventing root circling and improving water drainage. For herbs and lettuce, rigid plastic pots work fine and are easier to clean between plantings.
Soil Mix Recipe
Do not use garden soil or topsoil in containers — it compacts and suffocates roots. I use this mix for all my indoor vegetables:
- 60% high-quality potting mix (FoxFarm Ocean Forest or Miracle-Gro Potting Mix)
- 20% perlite for drainage and aeration
- 10% worm castings for slow-release nutrients
- 10% coconut coir for moisture retention
Mix these in a large tub or wheelbarrow before filling your pots. This blend drains well, holds moisture evenly, and provides enough nutrients for the first 4-6 weeks of growth. After that, you will need to supplement with liquid fertilizer.
Step 3: Choose Your Growing Method
- Soil in pots: Cheapest to start ($30-50), but slower growth and more maintenance
- Smart garden (AeroGarden/Click and Grow): Easiest ($100-400), automated watering and lighting
- Hydroponic system (DWC or NFT): Fastest growth ($50-200), but requires nutrient management. See our guide to the best hydroponic systems for beginners for a full comparison.
For beginners, I recommend starting with soil for your first season to learn plant behavior, then upgrading to a smart garden or hydroponic system once you understand the basics. That said, if you are impatient and want results fast, a hydroponic system will give you harvestable lettuce in 3 weeks versus 5-6 weeks in soil.
If hands-off convenience is your priority, a countertop smart garden is the easiest way to start — mine had basil sprouting in 6 days with zero fuss and no watering guesswork.
Step 4: Best Vegetables for Indoor Growing
Lettuce and Leafy Greens
Lettuce is the single easiest vegetable to grow indoors. I grow butter lettuce, romaine, and arugula year-round. Sow seeds directly in your container at 1/4 inch depth, keep the soil consistently moist, and you will have baby leaves in 21-28 days. Full-size heads take 45-55 days. Use the “cut-and-come-again” method: harvest outer leaves and let the center continue growing. One planting can produce 4-6 harvests over 8-10 weeks.
Key tips: Thin seedlings to 4-6 inches apart. Water when the top inch of soil feels dry. Harvest in the morning for the crispest leaves. Varieties I recommend: Salanova, Buttercrunch, and Black Seeded Simpson.
Herbs (Basil, Mint, Cilantro, Parsley)
Herbs are the most rewarding indoor crop because they grow fast, take minimal space, and cost $3-5 per bunch at the grocery store. Basil is my top recommendation — it germinates in 5-7 days and is ready for first harvest in 3-4 weeks. Pinch the top leaves regularly to encourage bushy growth and prevent flowering.
Mint grows aggressively indoors but should always be in its own pot because it will outcompete everything else. Cilantro is fast to germinate but bolts (goes to seed) quickly in warmth — keep it in a cooler spot (60-65°F) for longer harvests. For a detailed guide specifically on herb growing, read our article on how to grow herbs indoors without sunlight.
Cherry Tomatoes
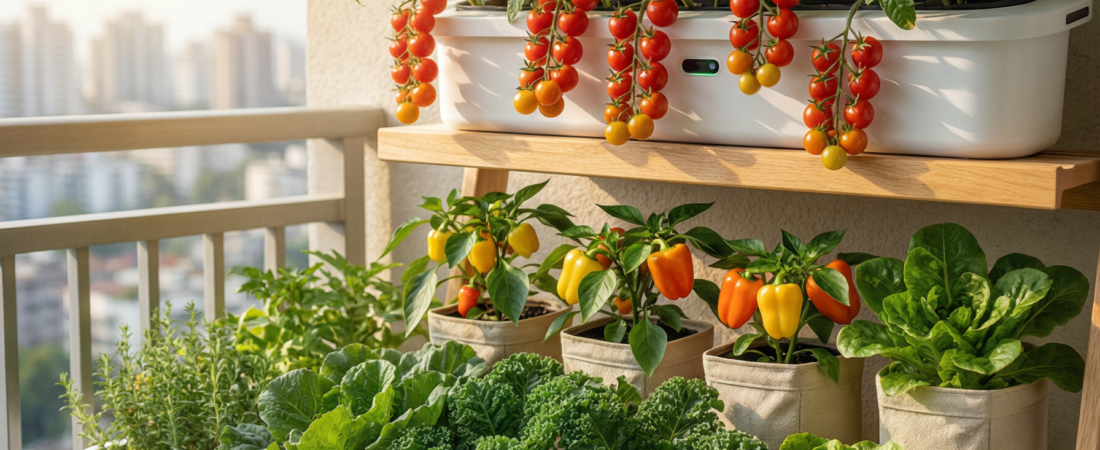
Cherry tomatoes are the most rewarding indoor fruiting crop, but they demand more from you than leafy greens. You need strong light (at least 20 watts of LED per plant, or a south-facing window with 8+ hours of sun), a 5-gallon container, and consistent feeding. I grow Tiny Tim and Red Robin varieties, which are compact dwarf types bred for container growing.
From seed to first harvest takes 60-75 days indoors. Hand-pollinate flowers by gently shaking the plant or using an electric toothbrush on the flower stems for 2-3 seconds. Feed with a tomato-specific fertilizer (higher phosphorus and potassium) once flowers appear.
Peppers
Small pepper varieties like Thai chilis, habaneros, and ornamental peppers grow well indoors. They need similar conditions to cherry tomatoes — strong light and warm temperatures (70-80°F). Start from seedlings rather than seeds to save 4-6 weeks. A single pepper plant in a 3-gallon pot can produce 15-30 peppers over a season indoors.
Microgreens
Microgreens are the fastest indoor crop you can grow — harvest in 7-14 days from seeding. I grow sunflower, radish, pea shoots, and broccoli microgreens on a simple seedling tray. Spread seeds densely on moist potting mix, cover with a humidity dome for 3 days, then remove the dome and place under a grow light. Harvest by cutting at the soil line when the first true leaves appear. One 10×20 tray yields about 8-12 ounces of microgreens.
Step 5: Watering Schedules and Techniques
Overwatering is the number one killer of indoor plants. Here is the watering schedule that works for me across all my indoor vegetables:
| Plant Type | Watering Frequency | How Much | Signs of Overwatering |
|---|---|---|---|
| Lettuce/Greens | Every 2-3 days | Until water drains from bottom | Yellowing leaves, mushy stems |
| Herbs | Every 3-4 days | Moderate, let top inch dry | Wilting despite wet soil, mold on soil |
| Tomatoes | Daily when fruiting | Deep watering to saturation | Cracking fruit, blossom end rot |
| Peppers | Every 2-3 days | Moderate, let top 2 inches dry | Dropping flowers, yellow leaves |
| Microgreens | Once daily (mist) | Light misting only | Mold, damping off |
The finger test: Stick your finger into the soil up to the first knuckle. If it feels dry, water. If it feels moist, wait another day. This simple test prevents 90% of watering problems.
Bottom watering technique: For herbs and lettuce, I recommend bottom watering. Place your pot in a saucer filled with water and let the soil absorb moisture from below for 20-30 minutes, then discard excess. This encourages roots to grow downward and prevents fungal issues on the soil surface.
Step 6: Common Problems and Solutions
Pests
Indoor gardens are not immune to pests. The most common ones I encounter are:
- Fungus gnats: Tiny black flies that hover around soil. They lay eggs in moist soil. Solution: Let the top 2 inches of soil dry between waterings, use yellow sticky traps ($8 for 30), and apply a thin layer of sand on the soil surface.
- Aphids: Small green or black insects on leaf undersides. Solution: Spray with a mixture of 1 teaspoon dish soap per quart of water, or use neem oil spray ($12). Check undersides of leaves weekly.
- Spider mites: Tiny red dots with fine webbing. Solution: Increase humidity, wipe leaves with a damp cloth, and apply insecticidal soap. Spider mites thrive in dry conditions, so keeping humidity above 40% helps prevent them.
Mold and Fungal Issues
White fuzzy mold on soil surface means you are overwatering or have poor air circulation. Scrape off the mold, reduce watering frequency, and add a small fan on low speed near your plants. Damping off (seedlings falling over and dying) is caused by the same fungi — prevent it by not overwatering seedlings and ensuring good airflow.
Nutrient Deficiency
Yellowing lower leaves usually means nitrogen deficiency. Pale leaves with purple stems suggest phosphorus deficiency. Brown leaf edges indicate potassium deficiency. For soil-grown plants, a balanced liquid fertilizer (like FoxFarm Grow Big at half strength) every 2 weeks after the first month solves most deficiencies. If you are growing hydroponically, our nutrients guide covers exactly what to buy and how to mix it.
Step 7: Harvesting Tips and Timeline
| Vegetable | Days to First Harvest | Harvest Method | Expected Yield per Plant |
|---|---|---|---|
| Baby Lettuce | 21-28 days | Cut outer leaves 2 inches above soil | 4-6 harvests over 8 weeks |
| Full Lettuce Head | 45-55 days | Cut entire head at base | 1 head per planting |
| Basil | 21-28 days | Pinch top leaves above a node | Ongoing for 4-6 months |
| Mint | 21 days | Cut stems 2 inches above soil | Ongoing for 1+ year |
| Cherry Tomatoes | 60-75 days | Pick when fully colored | 30-50 tomatoes per plant |
| Peppers | 70-90 days | Cut with scissors (do not pull) | 15-30 peppers per plant |
| Microgreens | 7-14 days | Cut at soil line with scissors | 8-12 oz per tray |
Pro tip: Harvest herbs and greens in the morning when water content is highest. Harvest tomatoes and peppers when fully colored — they will not ripen further off the plant indoors. Store herbs in a glass of water in the fridge for up to 2 weeks.
Seasonal Growing Calendar
One advantage of indoor growing is that seasons matter less, but light levels and temperatures still shift throughout the year. Here is my recommended planting schedule for maximum year-round production:
| Season | Best Crops | Light Strategy | Notes |
|---|---|---|---|
| Spring (Mar-May) | Tomatoes, peppers, basil | Window + supplemental LED | Start seeds for summer harvests |
| Summer (Jun-Aug) | All vegetables | Window light often sufficient | Watch for heat stress above 80°F |
| Fall (Sep-Nov) | Lettuce, herbs, microgreens | Transition to grow lights | Cooler temps benefit leafy greens |
| Winter (Dec-Feb) | Microgreens, lettuce, herbs | Grow lights essential (14-16 hrs) | Lowest light period — focus on easy crops |
Equipment Timeline and Budget
| Week | Task | Estimated Cost |
|---|---|---|
| Week 0 | Buy grow light, containers, seeds/seedlings | $50-150 |
| Week 1 | Plant seeds, set up light timer | $0 |
| Week 3-4 | First harvest of baby greens | $0 |
| Week 6-8 | Full harvest of mature herbs and greens | $5-10 (nutrients) |
Troubleshooting FAQ
Why are my seedlings tall and spind?
Leggy seedlings need more light. Move your grow light closer (2-4 inches above seedlings) or increase daily light hours to 16. You can also gently brush your hand across seedling tops daily — the mechanical stress encourages thicker stems.
My herbs taste bland. What went wrong?
Bland herbs usually result from insufficient light or too much nitrogen. Move your light closer and switch to a lower-nitrogen fertilizer. Herbs produce the most essential oils (flavor) under bright light and moderate feeding. Basil and mint grown under a 20W+ LED light taste noticeably stronger than those grown under weaker lights or in windows.
Can I grow vegetables indoors year-round?
Absolutely. I grow lettuce, herbs, and microgreens every month of the year. Fruiting crops like tomatoes and peppers are easiest from spring through fall when natural light supplements your grow lights. In winter, focus on leafy greens and herbs that tolerate lower light levels.
How much money does an indoor garden save?
In my experience, a modest indoor herb and lettuce garden saves $15-25 per month on grocery bills once it is established. Fresh herbs are the biggest savings — a single basil plant produces the equivalent of 8-10 grocery store packets ($3-4 each) over its lifetime. The initial investment in lights and containers pays for itself within 3-4 months.
Final Tips
Start small with 2-3 plants, track what grows well in your specific conditions, and expand gradually. The most common beginner mistake is trying to grow too many varieties at once. Once you master lettuce and basil, add cherry tomatoes, then peppers, then experiment with more challenging crops.
For detailed guidance on specific systems, read our complete guide to growing herbs without sunlight and our picks for the best indoor garden systems for small apartments. And if you want to skip soil entirely, our hydroponic systems comparison covers the six best options for beginners.