
Disclosure: This post contains affiliate links. If you buy through them, we may earn a small commission at no extra cost to you. We only recommend products we have genuinely researched and tested. Prices and availability are accurate as of the publish date but may change.
Why Microgreens Are the Easiest Thing You’ll Ever Grow
I still remember the first time I grew microgreens. I was skeptical that something so simple could produce such flavorful, nutrient-packed greens in under two weeks. Now, three years and hundreds of trays later, I have a permanent microgreens station in my kitchen, and I can honestly say it’s one of the most rewarding growing projects I’ve ever taken on.
Microgreens are young vegetable greens harvested just after the first true leaves appear. They’re packed with up to 40 times more nutrients than their mature counterparts, they grow in any small space, and you can harvest them in 7 to 14 days. Whether you have a sunny windowsill or a dedicated grow shelf, microgreens are the perfect entry point into indoor growing. If you’ve been looking at indoor garden systems for small apartments, microgreens are a great complement to any setup.
What Are Microgreens and Why Should You Grow Them?
Microgreens are not sprouts. Sprouts are germinated seeds eaten with roots and all, typically grown in water. Microgreens are grown in soil or a soilless medium, cut above the root line, and eaten as tiny leafy greens. They sit between sprouts and baby greens in terms of maturity.
Here’s why I keep coming back to microgreens year after year:
- Nutrition density: Research summarized by Penn State Extension shows microgreens can contain 4 to 40 times more vitamins and antioxidants than mature plants. Red cabbage microgreens, for example, have several times more vitamin C than mature red cabbage.
- Speed: Most varieties are ready to harvest in 7 to 14 days from seed. That’s the fastest turnaround of any edible crop you can grow.
- Space efficiency: A single 10×20-inch tray produces about 8 to 12 ounces of microgreens. You can stack trays vertically under a grow light for serious production in a tiny footprint.
- Year-round growing: No seasonal limitations. I grow microgreens in December just as easily as in July.
- Cost savings: Store-bought microgreens cost $3 to $5 per ounce. Homegrown ones cost roughly $0.50 to $1.00 per ounce when you buy seeds in bulk.
Best Microgreens Varieties for Beginners
Not all microgreens are created equal when you’re just starting out. After testing over 30 varieties, here are the ones I recommend for beginners based on ease of growing, flavor, and reliability:
Top 5 Beginner-Friendly Microgreens
- Sunflower: The undisputed champion for beginners. Large seeds that are easy to handle, nutty flavor, thick crunchy stems. Ready in 10 to 12 days. Always soak seeds for 8 to 12 hours before sowing.
- Pea Shoots: Sweet, tender, and almost impossible to mess up. They grow fast (8 to 10 days) and you can often get a second harvest by letting them regrow after cutting. Soak for 12 to 24 hours.
- Radish: Spicy and vibrant, radish microgreens add a real kick to salads and sandwiches. Extremely fast growers, often ready in 6 to 8 days. No soaking needed.
- Broccoli: Mild flavor, packed with sulforaphane (a powerful antioxidant). Reliable germination and steady growth. Ready in 8 to 12 days. No soaking needed.
- Wheatgrass: Grown for juicing rather than eating. Very hardy and forgiving. Ready to juice in 10 to 14 days. Soak for 8 to 12 hours.
Once you’ve mastered these basics, you can branch out to more advanced varieties like amaranth, basil, cilantro, and beet microgreens, which take a bit more finesse.
Equipment You Need to Get Started
One of the best things about microgreens is how little equipment you need. Here’s my complete setup list:
Essential Equipment
- Growing trays: Standard 10×20-inch seedling trays. Get trays with holes for drainage plus a solid bottom tray underneath to catch water. A set of 5 to 10 trays costs around $15 to $25 on Amazon.
- Growing medium: I use coconut coir or a peat-based seed starting mix. Coconut coir bricks cost about $10 and expand to fill dozens of trays. Avoid regular potting soil; it’s too heavy and can harbor pathogens.
- Seeds: Buy seeds specifically labeled for microgreens. They’re untreated and tested for germination rates. Reliable brands include True Leaf Market, Mumm’s Sprouting Seeds, and Todd’s Seeds. Expect to pay $5 to $15 per pound depending on variety.
- Light source: A basic T5 fluorescent or LED shop light works perfectly. You don’t need expensive grow lights for microgreens. A 2-foot LED shop light from Walmart costs about $20 and covers two trays. Check out our guide on the best LED grow lights for indoor herbs for options that double as microgreens lights.
- Spray bottle: A fine-mist spray bottle for watering without disturbing seeds. About $3 to $5.
- Kitchen scale (optional): For weighing seeds to ensure consistent sowing density. A basic digital scale costs $10.
Total Startup Cost
You can get everything you need to start growing microgreens for $40 to $75. That’s less than what you’d spend on two or three bags of store-bought microgreens at Whole Foods.
If you would rather skip sourcing parts one by one, a ready-made microgreens starter kit bundles trays, medium, seeds, and a dome so you can sow your first tray the same day it arrives.
Step-by-Step Growing Process
Here’s the exact process I follow every time I start a new tray. This method has given me consistent results across dozens of varieties.
Step 1: Prepare Your Growing Medium
Fill your tray with drainage holes with about 1 to 1.5 inches of pre-moistened coconut coir or seed starting mix. Level it out with your hand or a small board, pressing down lightly to create a flat, even surface. Don’t pack it too tightly; you want some air space in the medium.
Step 2: Soak Seeds (If Required)
Larger seeds like sunflower, pea, and wheatgrass benefit from soaking. Place seeds in a jar or bowl, cover with 2 to 3 times their volume in water, and soak for 8 to 12 hours (overnight is convenient). Drain and rinse before sowing. Small seeds like broccoli, radish, and kale don’t need soaking.
Step 3: Sow the Seeds
Sprinkle seeds evenly across the surface of your growing medium. Aim for a dense but not overlapping layer. For a 10×20 tray, I use approximately:
- Sunflower: 150 to 180 grams (about 1 cup dry)
- Pea shoots: 200 to 250 grams (about 1.5 cups dry)
- Radish: 30 to 40 grams (about 2 tablespoons)
- Broccoli: 20 to 30 grams (about 1.5 tablespoons)
After sowing, mist the seeds gently with your spray bottle to settle them into the medium.
Step 4: The Blackout Period (Days 1 to 3)
This is the step that surprises most beginners. Stack a second empty tray on top of your seeded tray (or cover with a dark towel or lid) to block all light. Place a light weight on top, like a book or a small brick. This simulates being underground and forces the seedlings to push upward, creating strong, sturdy stems. Keep the cover on for 2 to 4 days depending on variety.
Step 5: Introduce Light (Days 3 to 5)
Once the seedlings are about 1 inch tall and have pushed up the weight, remove the cover. You’ll see pale yellow seedlings. Place them under your grow light, positioned 6 to 12 inches above the tray. Run the light for 12 to 16 hours per day. Within 24 to 48 hours, the leaves will turn a deep, vibrant green as chlorophyll production kicks in.
Step 6: Water and Maintain
Bottom-water your trays by pouring water into the solid bottom tray underneath. This keeps the foliage dry and prevents mold. Add about 1 to 2 cups of water per tray, and let the medium wick it up. Check daily and add water as needed. The medium should be moist but never soggy.
Day-by-Day Growing Timeline
Here’s a typical timeline for growing sunflower microgreens, one of the most popular beginner varieties:
| Day | What’s Happening | Your Task |
|---|---|---|
| Day 0 | Seeds soaked overnight | Prepare medium, soak seeds |
| Day 1 | Seeds sown, blackout begins | Sow seeds, cover tray, mist |
| Day 2 | Germination underway | Check moisture, mist if dry |
| Day 3 | Sprouts pushing up, 0.5 to 1 inch | Remove cover if seedlings are pushing weight |
| Day 4 | Yellow seedlings exposed to light | Place under lights, bottom-water |
| Day 5 | Leaves turning green | Water daily, monitor for mold |
| Day 6 | First true leaves developing | Continue watering, check growth |
| Day 7 | 2 to 3 inches tall | Assess readiness |
| Day 8 to 10 | True leaves open, 3 to 4 inches | Harvest when true leaves are fully open |
Faster varieties like radish may be ready by day 6 or 7. Slower growers like beet or amaranth may need 14 to 18 days.
Harvesting and Storage
Harvest microgreens when the first true leaves (the second set of leaves) have fully opened. The initial round leaves are called cotyledons; the true leaves look different and are usually more flavorful.
How to Harvest
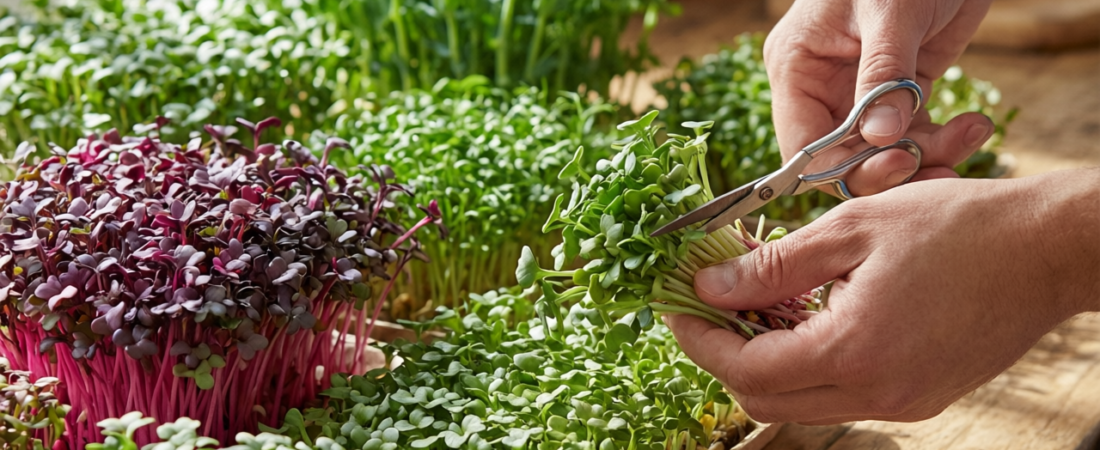
- Use clean, sharp scissors or a sharp knife.
- Cut about 0.5 inches above the growing medium surface.
- Harvest in small bunches, cutting across the tray.
- Avoid pulling up growing medium with the stems.
- Do not wash microgreens before storing; wash just before eating.
Storage Tips
Place harvested microgreens in a sealed container or zip-lock bag with a dry paper towel to absorb excess moisture. Store in the refrigerator at 38 to 40 degrees Fahrenheit. Properly stored, most microgreens will stay fresh for 7 to 10 days. I’ve found that sunflower and pea shoots last the longest, while radish and broccoli are best eaten within 5 days.
Common Mistakes and How to Avoid Them
In my first year of growing microgreens, I made every mistake in the book. Here are the most common problems and how to fix them:
Mold or Fungus
White fuzzy growth on the medium or stems usually means too much moisture and poor airflow. Because microgreens are eaten raw, food-safety guidance from the University of Minnesota Extension stresses clean trays, clean water, and good air circulation to limit pathogen risk. Fix: Reduce watering, increase airflow with a small fan, and ensure you’re not over-sowing. Some white root hairs on stems are normal and often mistaken for mold.
Leggy, Stretching Growth
Tall, thin, pale stems mean the seedlings aren’t getting enough light. Fix: Move your light source closer (6 inches above the canopy) and increase light duration to 14 to 16 hours per day.
Slow or Uneven Germination
Patchy growth usually means old seeds, uneven sowing, or inconsistent moisture. Fix: Buy fresh seeds from a reputable supplier, sow evenly, and keep the medium consistently moist during the blackout period.
Bitter or Tough Greens
Microgreens that grow too long past the true leaf stage can become bitter or fibrous. Fix: Harvest promptly when true leaves are fully open. Don’t let them grow into baby greens.
Cost Breakdown: Homegrown vs. Store-Bought
Let’s run the numbers, because this is where microgreens really shine. If you’re interested in understanding hydroponic nutrients and growing costs, microgreens are an even simpler starting point.
| Item | Store-Bought (Weekly) | Homegrown (Weekly) |
|---|---|---|
| Microgreens (8 oz) | $8 to $12 | $1.50 to $3.00 |
| Variety selection | Limited to 2 to 3 types | Dozens of options |
| Freshness | 3 to 7 days old | Harvested minutes ago |
| Annual cost (weekly growing) | $416 to $624 | $78 to $156 |
After the initial equipment investment of $40 to $75, you can save $300 to $500 per year compared to buying microgreens at the store. The equipment pays for itself within the first month.
Recipe Ideas and Nutritional Benefits
Microgreens are incredibly versatile in the kitchen. Here are some of my favorite ways to use them:
- Sunflower microgreens on avocado toast: The nutty crunch pairs perfectly with creamy avocado and a squeeze of lemon.
- Radish microgreens in tacos: Their spicy bite cuts through rich meats and adds a fresh pop of color.
- Pea shoot salad: Toss pea shoots with a light vinaigrette, shaved parmesan, and toasted almonds.
- Broccoli microgreen smoothie: Blend a handful into your morning smoothie. You won’t taste them, but you’ll get the nutrient boost.
- Wheatgrass shots: Juice wheatgrass with a masticating juicer and take a 1-ounce shot daily for an intense health boost.
Nutritionally, microgreens are rich in vitamins C, E, and K, along with beta-carotene and a range of antioxidants. Adding just a small handful to your daily meals can meaningfully increase your micronutrient intake without any cooking or prep.
Your Microgreens Growing Schedule
To maintain a continuous supply, I recommend starting a new tray every 3 to 4 days. Here’s a simple weekly rotation:
| Day | Action |
|---|---|
| Monday | Start Tray 1 (e.g., sunflower) |
| Thursday | Start Tray 2 (e.g., radish) |
| Sunday | Start Tray 3 (e.g., pea shoots), harvest Tray 1 |
| Wednesday | Start Tray 4, harvest Tray 2 |
With this rotation, you’ll have fresh microgreens ready for harvest roughly every 3 to 4 days. Adjust timing based on the varieties you’re growing and your household’s consumption.
Frequently Asked Questions
Do microgreens regrow after cutting?
Most microgreens do not regrow after harvest because you cut them above the root and there is no growing point left. The main exception is pea shoots, which will often push a second, smaller flush if you cut above the lowest node. For everything else, it is faster and more reliable to simply start a fresh tray.
Do I need a grow light, or is a windowsill enough?
A bright south-facing windowsill can work in spring and summer, but results are inconsistent and seedlings tend to stretch toward the glass. In my kitchen, trays under a $20 LED shop light stay short and uniform, while windowsill trays lean and grow leggy. A simple light run 12 to 16 hours a day gives far more dependable harvests year-round.
Can I reuse the growing medium after harvesting?
I do not recommend reusing coconut coir or seed-starting mix for a second crop of microgreens. The leftover roots break down and invite mold, and germination on used medium is noticeably patchier. Compost the spent medium and root mat instead, and start each tray with fresh material.
Why did my seeds get moldy instead of sprouting?
Mold almost always comes from over-sowing, over-watering, or stagnant air during the blackout period. Sow seeds in a dense single layer rather than a thick pile, bottom-water instead of soaking the surface, and run a small fan once the cover comes off. Remember that fuzzy white root hairs near the stem base are normal and disappear when misted.
Are homegrown microgreens safe to eat raw?
Yes, when grown cleanly. Use clean trays, clean water, and a fresh medium, keep good airflow, and rinse the greens right before eating rather than before storage. Following basic food-safety practices from sources like university extension programs keeps raw microgreens both safe and long-lasting in the fridge.
Final Thoughts
Microgreens are the gateway drug of indoor growing. They’re fast, forgiving, delicious, and unbelievably nutritious. If you’ve been on the fence about starting an indoor garden, microgreens are where I’d tell you to begin. You’ll go from seed to harvest in under two weeks, and once you taste homegrown sunflower or radish microgreens, you’ll never go back to the plastic clamshells at the grocery store.
If you want to expand beyond microgreens, take a look at our guide on starting an indoor vegetable garden for a more comprehensive approach to year-round growing.
Start with sunflower and radish. Get a few successful harvests under your belt. Then experiment with varieties, stacking trays, and dialing in your grow light setup. Before you know it, you’ll have a thriving microgreens operation right in your kitchen. Happy growing!