Disclosure: This post contains affiliate links. If you buy through them, we may earn a small commission at no extra cost to you. We only recommend products we have genuinely researched and tested. Prices and availability are accurate as of the publish date but may change.
Why Every Serious Gardener Starts Seeds Indoors
I used to buy seedlings from the garden center every spring. A six-pack of tomato starts cost $5 to $8, and I’d need four or five packs to fill my beds. Then one winter I did the math: a single packet of tomato seeds costs $3 and contains 30 to 50 seeds. That same $5 I spent on one six-pack could produce dozens of plants in dozens of varieties that no garden center would ever stock.
Starting seeds indoors isn’t just about saving money, though. It gives you 6 to 10 extra weeks of growing time, access to hundreds of heirloom and specialty varieties, and the deep satisfaction of growing a plant from its very first day of life. If you’ve been relying on nursery transplants, this guide will show you exactly how to make the switch. For a broader approach to growing food indoors year-round, check out our complete indoor vegetable garden guide.
Why Start Seeds Indoors Instead of Direct Sowing?
Not every seed needs to be started indoors. But for many crops, indoor seed starting offers clear advantages:, per University of Minnesota Extension.
- Extended growing season: In zones 5 and 6, your outdoor growing season may be only 140 to 160 days. Tomatoes, peppers, and eggplants need 80 to 120 days from transplant. Starting them indoors 6 to 8 weeks before your last frost gives them a massive head start.
- Variety selection: Garden centers stock 5 to 10 tomato varieties at most. Seed catalogs offer hundreds. Want to grow Cherokee Purple, Black Krim, or Green Zebra tomatoes? You’ll need to start from seed.
- Cost savings: A packet of 30 seeds costs $2 to $4. A single nursery transplant costs $4 to $8. If even half your seeds germinate, you’re saving 80 percent or more.
- Healthier plants: You control the growing conditions from day one. No root-bound, stressed, or pest-infested seedlings from a crowded garden center bench.
- Succession planting: Starting seeds indoors lets you stagger plantings precisely, ensuring a continuous harvest rather than everything ripening at once.
Best Seeds to Start Indoors vs. Direct Sow
Not all crops benefit from indoor starting. Some actually resent transplanting and should be sown directly in the garden. Here’s how I sort them:
Always Start Indoors
- Tomatoes: Need 6 to 8 weeks of indoor growth before transplanting.
- Peppers (sweet and hot): Slow growers that need 8 to 10 weeks indoors. Hot peppers especially need extra time.
- Eggplant: Requires 8 to 10 weeks indoors; very cold-sensitive.
- Broccoli and cauliflower: Start 4 to 6 weeks before transplanting for a head start on the season.
- Onions and leeks: Start 10 to 12 weeks before transplanting. Very slow from seed.
- Herbs (basil, parsley, cilantro): Start 4 to 6 weeks indoors for established transplants.
Always Direct Sow Outdoors
- Root vegetables (carrots, parsnips, radishes): Transplanting damages the taproot.
- Beans and peas: Fast growers that don’t benefit from indoor starting.
- Corn: Doesn’t transplant well; grows too fast to justify indoor starting.
- Squash and zucchini: Can be started indoors but are so fast-growing that direct sowing is easier. Start indoors only 2 to 3 weeks before transplanting if your season is very short.
Either Method Works
- Lettuce and spinach: Can be started indoors for early transplants or direct-sown for succession planting.
- Cucumbers and melons: Start indoors 2 to 3 weeks before transplanting in cold climates. Direct sow in warm climates.
- Flowers (zinnias, marigolds, cosmos): Start indoors for earlier blooms or direct sow after frost.
Equipment You Need for Seed Starting
Here’s my complete seed starting setup. The total investment is $60 to $120 for everything, and most of it lasts for years., following Penn State Extension.
Seed Trays and Cells
I use standard 1020 seedling flats with 72-cell inserts. A set of 10 trays with cells and humidity domes costs about $15 to $25 on Amazon. The cells are about 1.5 inches square, which is enough room for most seedlings to grow for 4 to 6 weeks. For larger seeds like squash and cucumbers, use 3.5-inch pots to avoid transplanting too early.
Seed Starting Mix
Do not use regular potting soil or garden soil. Seed starting mix is a fine-textured, sterile, soilless blend (usually peat moss, vermiculite, and perlite) that provides the perfect environment for delicate seedling roots. I use Espoma Organic Seed Starter Mix or Pro-Mix Seed Germination. A 16-quart bag costs $8 to $12 and fills about 6 to 8 trays.
Heat Mats
Many seeds need soil temperatures between 70 and 80 degrees Fahrenheit to germinate well. Room temperature in most homes is 65 to 70 degrees, which is borderline. A seedling heat mat raises the soil temperature by 10 to 20 degrees and dramatically improves germination rates and speed. The VIVOSUN Seedling Heat Mat (about $15 to $20) is what I use, and it fits perfectly under a standard 1020 tray. For peppers and eggplant, a heat mat is almost essential.
Grow Lights
A sunny south-facing window can work, but most seedlings grown on windowsills become leggy and weak because light intensity drops dramatically even a few feet from the glass. A dedicated grow light positioned 2 to 4 inches above the seedlings produces stocky, vigorous transplants. I recommend a T5 fluorescent fixture or an LED grow light panel. A 2-foot T5 HO fixture with a 6500K bulb costs about $30 to $45. For a comprehensive look at options, read our guide to the best LED grow lights for indoor herbs and seedlings.
Additional Supplies
- Plant labels and marker: Label every cell. You will forget what you planted. Trust me on this. Plastic T-labels and a waterproof garden marker cost about $5 for a set of 100.
- Dome lids or plastic wrap: Maintain humidity during germination. Most seed trays come with clear dome lids.
- Fan: A small oscillating fan on low speed strengthens stems and prevents damping-off disease. Run it for a few hours daily once seedlings emerge.
- Watering can with fine rose or spray bottle: Gentle watering that won’t displace seeds or crush tiny seedlings.
Step-by-Step Seed Starting Process
Here’s the exact method I follow for every batch of seeds, whether it’s tomatoes in February or basil in April.
- Pre-moisten the seed starting mix: Put the mix in a large bowl or bucket and add warm water until it’s evenly moist but not dripping wet. Think of a wrung-out sponge. Dry mix repels water, so pre-moistening is essential.
- Fill the cells: Press the moistened mix into each cell, filling to just below the rim. Tap the tray on the table to settle the mix. Don’t pack it tightly.
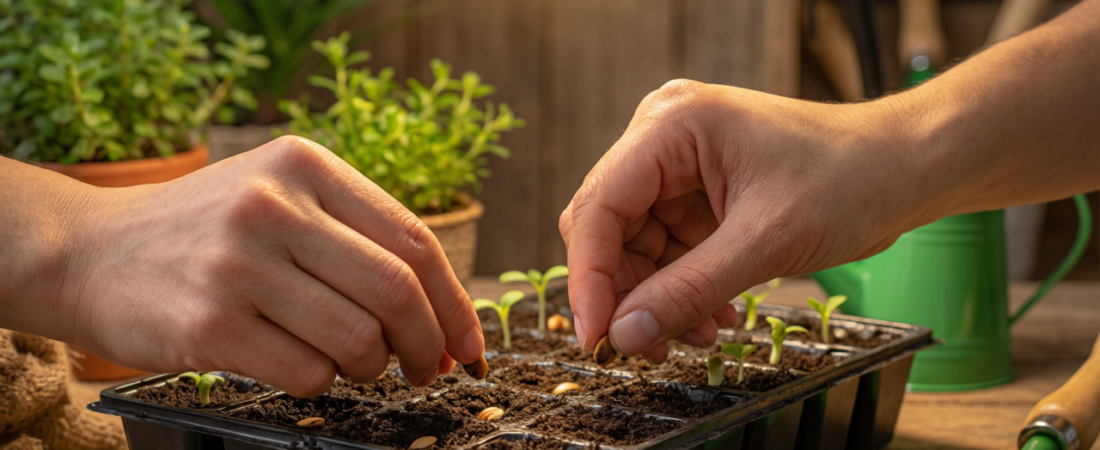
- Sow the seeds: Place 1 to 2 seeds per cell. General rule: plant seeds at a depth of 2 to 3 times their diameter. Tiny seeds (lettuce, basil) go on the surface with a light covering of vermiculite. Larger seeds (tomatoes, peppers) go about 1/4 inch deep.
- Label everything: Write the variety name and sowing date on a label and stick it in the tray.
- Mist and cover: Gently mist the surface with water. Place the clear dome lid on the tray to maintain humidity.
- Apply bottom heat: Place the tray on a heat mat set to 75 to 78 degrees Fahrenheit. Check your seed packet for the optimal germination temperature.
- Wait and watch: Check daily. Most seeds germinate in 5 to 14 days. Tomatoes: 5 to 10 days. Peppers: 10 to 20 days (hot peppers can take 21+ days). Basil: 5 to 10 days. Lettuce: 3 to 7 days.
- Remove dome and add light: As soon as you see the first seedlings poking through, remove the humidity dome and turn on the grow light. Position it 2 to 4 inches above the tallest seedling. Run the light 14 to 16 hours per day.
- Thin seedlings: If both seeds in a cell germinate, snip off the weaker one with scissors. Don’t pull it out; you’ll disturb the roots of the keeper.
- Begin gentle watering: Bottom-water by pouring water into the tray underneath. Let the cells wick up moisture for 20 minutes, then drain excess. The mix should be moist but never soggy.
Optimal Conditions for Germination
Temperature
Most vegetable seeds germinate best between 70 and 80 degrees Fahrenheit. Cool-season crops (lettuce, broccoli, kale) are fine at 60 to 70 degrees. Warm-season crops (tomatoes, peppers, eggplant) strongly prefer 75 to 85 degrees. A heat mat is the easiest way to hit these targets.
Moisture
The seed starting mix should be consistently moist but never waterlogged. Over-watering causes damping-off, a fungal disease that kills seedlings at the soil line. Under-watering stops germination or causes sprouted seeds to dry out and die. The dome lid retains moisture during germination; once seedlings emerge, good airflow becomes more important than high humidity.
Light
Most seeds don’t need light to germinate (they’re underground, after all). But the instant they break the surface, they need bright light immediately. Without sufficient light, seedlings stretch toward the source within hours, producing thin, weak, “leggy” stems that never fully recover. Position your light 2 to 4 inches above seedlings and raise it as they grow.
Common Germination Problems and Fixes
Seeds Don’t Germinate
Possible causes: seeds are too old (check expiration date), soil temperature is too low (add a heat mat), seeds were planted too deep (follow the 2 to 3x depth rule), or the mix dried out after sowing (keep the dome on and check moisture daily).
Damping-Off Disease
Seedlings emerge healthy, then suddenly topple over with a pinched, water-soaked stem at the soil line. This is caused by soil-borne fungi (Pythium, Rhizoctonia) and is almost always due to over-watering, poor airflow, or non-sterile growing medium. Prevention: Use sterile seed starting mix, don’t over-water, run a fan for airflow, and sprinkle cinnamon powder on the soil surface as a natural fungicide.
Leggy Seedlings
Tall, thin, pale seedlings with long gaps between leaves. Cause: Insufficient light. Fix: Lower the light to 2 inches above seedlings, increase light duration to 16 hours, or upgrade to a brighter light fixture. You can bury leggy tomato seedlings deeper when transplanting (they’ll root along the buried stem), but peppers and other crops don’t tolerate this trick.
Yellow or Pale Seedlings
After the first true leaves appear, seedlings may yellow if they’ve used up the nutrients in the seed starting mix. Fix: Begin feeding with a diluted (1/4 strength) liquid fertilizer once the first true leaves develop. Fish emulsion or a balanced liquid seaweed fertilizer works well.
Transplanting Seedlings: Hardening Off and Timing
Moving seedlings from the controlled indoor environment to the harsh outdoor garden is the most dangerous moment in a plant’s young life. The process of acclimating them is called “hardening off,” and it takes 7 to 10 days.
Hardening Off Schedule
- Days 1 to 2: Place seedlings outdoors in full shade for 2 to 3 hours, then bring them back inside.
- Days 3 to 4: Move to dappled shade for 4 to 5 hours.
- Days 5 to 6: Morning sun (before 11am) for 4 to 5 hours, then shade for the rest of the day.
- Days 7 to 8: Full sun for most of the day, but bring in if temperatures drop below 50 degrees.
- Days 9 to 10: Leave out overnight if nighttime temperatures are above 50 degrees. Transplant into the garden on a cloudy day or in the evening to minimize shock.
When to Transplant
Transplant after your area’s last expected frost date. Seedlings should have at least 2 to 4 sets of true leaves and a sturdy stem. Tomatoes can be transplanted when 6 to 10 inches tall. Peppers should be at least 4 to 6 inches. Don’t rush; a late frost can kill warm-season transplants overnight.
Seed Starting Calendar by Zone
Here’s a general schedule based on your last frost date. Find your zone’s approximate last frost date and count backward:
| Crop | Weeks Before Last Frost to Start | Transplant After Last Frost | Germination Temp |
|---|---|---|---|
| Onions/Leeks | 10 to 12 weeks | 4 weeks before | 60 to 70F |
| Peppers (hot) | 10 to 12 weeks | 1 to 2 weeks after | 80 to 85F |
| Peppers (sweet) | 8 to 10 weeks | 1 to 2 weeks after | 75 to 80F |
| Eggplant | 8 to 10 weeks | 2 to 3 weeks after | 75 to 85F |
| Tomatoes | 6 to 8 weeks | 1 to 2 weeks after | 70 to 80F |
| Broccoli/Cauliflower | 4 to 6 weeks | 2 to 4 weeks before | 60 to 70F |
| Lettuce/Kale | 4 to 6 weeks | 2 to 4 weeks before | 60 to 70F |
| Basil | 4 to 6 weeks | 1 to 2 weeks after | 70 to 80F |
| Cucumbers/Squash | 2 to 3 weeks | 1 to 2 weeks after | 70 to 85F |
Best Seed Starting Products
After years of testing, here are the products I consistently recommend:
- Seed starting mix: Pro-Mix Seed Germination or Espoma Organic Seed Starter ($8 to $12 per bag)
- Seed trays: Bootstrap Farmer 72-cell trays with humidity domes ($3 to $5 per set)
- Heat mat: VIVOSUN Seedling Heat Mat with thermostat ($18 to $25 for the thermostat version; worth the upgrade)
- Grow light: Barrina T5 LED Grow Light 2-pack ($25 to $35) or a 2-foot Sun Blaze T5 HO fixture ($35 to $45)
- Fertilizer: Neptune’s Harvest Fish and Seaweed Blend ($12 to $15) at 1/4 strength for seedlings
- Seeds: Baker Creek Heirloom Seeds, Johnny’s Selected Seeds, or Botanical Interests for high germination rates and variety
Tips for Specific Plants
Tomatoes
Start 6 to 8 weeks before last frost. When transplanting into larger pots or the garden, bury the stem 2 to 3 inches deeper than it was growing. Tomatoes root along the buried stem, creating a stronger root system. Remove any leaves that will be below the soil line.
Peppers
Start 8 to 12 weeks before last frost. Peppers are notoriously slow to germinate, especially hot varieties. Use a heat mat at 80 to 85 degrees and be patient; some habanero seeds take 21 to 28 days. Don’t bury pepper stems deeper when transplanting; unlike tomatoes, they don’t root along the stem.
Herbs
Basil is the easiest herb to start from seed. Start 4 to 6 weeks before last frost. Basil seeds germinate in 5 to 10 days at 70 to 80 degrees. Pinch the growing tip when seedlings have 3 to 4 sets of leaves to encourage bushy growth. For growing herbs indoors without natural light, see our guide on how to grow herbs indoors without sunlight.
Flowers
Zinnias, marigolds, and cosmos are easy from seed. Start 4 to 6 weeks before last frost. Don’t start them too early; overgrown flower seedlings bloom poorly after transplanting. Sunflowers should be direct-sown because they resent transplanting.
Final Thoughts
Starting seeds indoors is one of the most satisfying skills in gardening. There’s something almost magical about watching a tiny seed transform into a vigorous seedling under your care. The initial setup takes a modest investment, but the payoff is enormous: earlier harvests, more variety, and significant cost savings over buying transplants.
Start with tomatoes and basil. They’re the easiest warm-season crops and give fast, rewarding results. Once you’ve got those dialed in, add peppers, eggplant, and broccoli to your rotation. Before long, your seed starting station will be the backbone of your entire garden.
The learning curve is gentle. Your first batch might not be perfect, but even mediocre home-started seedlings will outperform nursery transplants that have been sitting on a shelf for weeks. Start this season, take notes, and improve each year. Your garden (and your wallet) will thank you.
Frequently Asked Questions
When should I start seeds indoors?
Most cool-season crops should be started 6 to 8 weeks before your last expected frost date. Warm-season crops like tomatoes and peppers typically need 8 to 10 weeks. Check your USDA hardiness zone and count backward from your local last-frost date.
Why do my seedlings get tall and leggy?
Leggy seedlings are almost always caused by insufficient light. Seedlings need 14 to 16 hours of bright light per day, with the light source only 2 to 4 inches above the canopy. A basic T5 fluorescent or LED grow light fixture solves this.
What is damping off and how do I prevent it?
Damping off is a fungal disease that causes seedlings to collapse at the soil line. Prevention comes down to using sterile seed-starting mix, avoiding overwatering, providing good air circulation with a small fan, and keeping the growing area clean.