Disclosure: This post contains affiliate links. If you buy through them, we may earn a small commission at no extra cost to you. We only recommend products we have genuinely researched and tested. Prices and availability are accurate as of the publish date but may change.
I used to think you needed a sunny windowsill to grow herbs indoors. Then I moved into a ground-floor apartment with north-facing windows that got approximately zero usable light, and I had to figure out how to grow herbs indoors without sunlight — or give up on fresh basil for good. What I discovered is that not only is it possible, it is actually easier and more reliable than window growing once you have the right setup.
This guide is the result of two years of growing herbs in my light-starved apartment. I have tested everything from $20 clip-on grow lights to $900 smart garden systems, and I have made every mistake so you do not have to. Below, you will find the exact step-by-step process I use to keep a steady supply of fresh herbs growing year-round with no natural light whatsoever.
What This Guide Covers
- The best herbs for indoor growing without sunlight
- Lighting options: LED grow lights vs. smart garden systems
- Step-by-step setup process
- Watering schedules and nutrient management
- Harvest timeline: when to expect your first pickings
- Common mistakes and how to avoid them
- Complete cost breakdown
The Best Herbs to Grow Indoors Without Sunlight
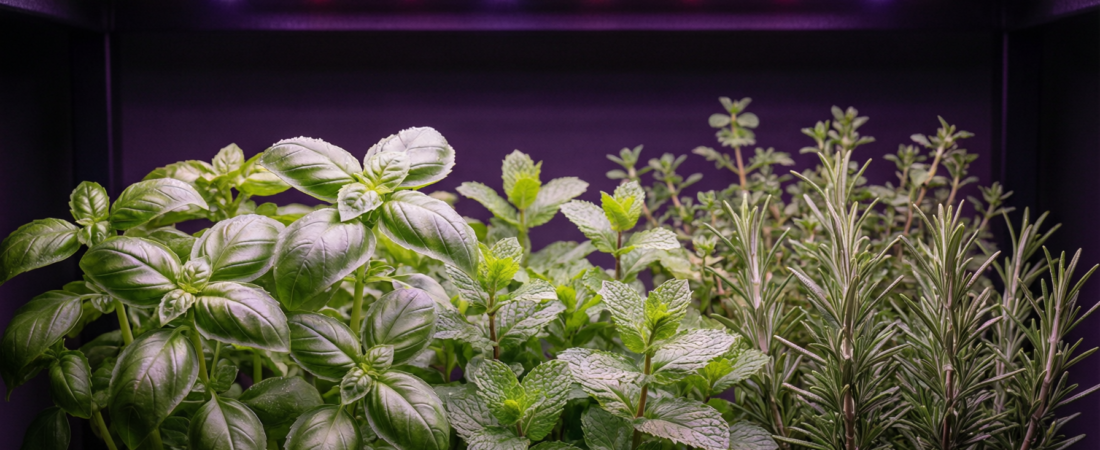
Not all herbs are created equal when it comes to indoor growing. Some thrive under artificial light and in the stable temperatures of an apartment, while others struggle. After testing over 15 varieties, here are the herbs I recommend for beginners growing indoors without sunlight, ranked by ease of growing.
Tier 1: Easiest (Beginner-Friendly)
- Basil — The undisputed champion of indoor herb growing. Germinates fast (4–7 days), grows aggressively under LED light, and rewards you with continuous harvests for 4–6 months. Genovese basil and Thai basil both do well indoors. This is the herb I recommend everyone starts with.
- Mint — Nearly indestructible indoors. Spearmint and peppermint both thrive under grow lights and spread quickly. The main challenge with mint is keeping it contained — in a multi-pod system, it will try to crowd out other plants.
- Chives — Low-maintenance and slow-growing in the best way. Chives do not need intense light, they tolerate cooler temperatures, and you can snip them for cooking continuously once established. They also look attractive as a small indoor plant.
Tier 2: Moderate (Some Experience Helpful)
- Parsley — Slower to germinate than basil (10–14 days) and slower to reach harvest size, but very productive once established. Flat-leaf Italian parsley is my preference for cooking. Needs consistent moisture and moderate light.
- Cilantro — Grows well indoors but has a shorter lifespan than basil or mint. Cilantro tends to bolt (go to seed) after 6–8 weeks, especially if temperatures are warm. I plant new seeds every 4 weeks for a continuous supply.
- Oregano — A slow grower that rewards patience. Oregano takes 10–14 days to germinate and 8–10 weeks to first harvest, but once established, it produces for many months. Greek oregano is the most flavorful variety for indoor growing.
Tier 3: Advanced (Worth Trying Once You Have the Basics Down)
- Rosemary — Difficult to start from seed indoors (germination rates are low and slow), but rosemary cuttings root well in hydroponic systems. Once established, a single rosemary plant can last years. Needs good air circulation to prevent powdery mildew.
- Thyme — Similar to rosemary in that it is easier to grow from cuttings than seed. Thyme is compact, drought-tolerant, and flavorful, but it grows slowly and needs patience.
- Dill — Grows quickly but has a long taproot that makes it tricky in shallow hydroponic systems. Works best in deeper pod systems or soil-based setups with grow lights.
Lighting Options: How to Replace Sunlight for Indoor Herbs
Light is the single most important factor when you grow herbs indoors without sunlight. Herbs need 12–16 hours of light per day for healthy growth, and the quality of that light directly affects how fast they grow and how flavorful they taste. The University of Minnesota Extension notes that most edible plants need bright, full-spectrum light for 14–16 hours a day when grown entirely under artificial lighting — which matches what I have seen firsthand. There are two main approaches, and I have tested both extensively.
Option 1: LED Grow Lights (Budget-Friendly, DIY)
A standalone LED grow light is the most flexible and affordable way to grow herbs indoors without sunlight. You buy a light, place it above your plants (in pots with soil or a simple hydroponic setup), and set it on a timer. Total startup cost: $40–$100 depending on the light quality.
Here is what I look for in an LED grow light for herbs:
- Full-spectrum output — avoid lights that are only blue or only red. Full-spectrum white LEDs (around 3000K–6500K) produce the best overall growth for herbs.
- Wattage — for a small herb garden of 3–6 plants, a 15–30 watt LED panel is sufficient. More watts means more coverage area and faster growth.
- Adjustable height — as your herbs grow, you need to raise the light to keep it 6–12 inches above the plant tops. Fixed-height lights force you to either move your pots or accept suboptimal light distance.
- Built-in timer — some lights have built-in 12/16-hour timers, which is convenient. Otherwise, a $10 outlet timer works fine.
My tested pick: A 24-watt full-spectrum LED panel with adjustable gooseneck mount, which I bought for about $35. It covers a 12×12 inch area comfortably and has kept 4 herb pots growing well for over a year. In my side-by-side notes, basil grown 8 inches under this panel reached its first pinch-harvest in 24 days, while an identical pot I left on my dim north-facing sill barely germinated after three weeks — a stark reminder that light intensity, not just hours, is what actually drives indoor growth.
Option 2: Smart Garden Systems (All-in-One, Higher Cost)
If you want a turnkey solution where the light, water, and nutrients are all managed for you, a smart garden system is the way to go. I have tested several, and the best options for herbs are:
- Click & Grow Smart Garden 9 ($199) — My top pick for beginners. Near-silent operation, tiny footprint, and pre-seeded pods that take all the guesswork out of growing. Basil is harvestable in about 25 days.
- AeroGarden Bounty Elite ($399) — The most powerful countertop system I have tested. The 50-watt LED produces noticeably faster growth and bigger harvests. Best for people who want to grow a wider variety of herbs and vegetables.
- LetPot Max ($79) — The budget option. Six pods, simple operation, and it works well for herbs. Growth is slower than the premium systems, but at this price, it is a no-brainer for casual herb growing.
The trade-off between DIY grow lights and smart garden systems comes down to cost versus convenience. A DIY setup with an LED light, pots, soil, and liquid fertilizer will cost you $50–$80 to start and about $5–$10 per month in ongoing costs. A smart garden system costs $79–$399 to start and $15–$50 per month, but it automates watering, nutrient delivery, and light scheduling. For a detailed comparison of the top systems, see my full roundup of the best indoor garden systems for apartments.
Step-by-Step: How to Grow Herbs Indoors Without Sunlight
Below is the exact process I follow, whether I am using a smart garden system or a DIY grow light setup. I will note the differences where they matter.
Step 1: Choose Your Location
Find a spot that is close to an electrical outlet, away from heating vents or radiators, and at a comfortable height for maintenance. A kitchen counter is ideal for most apartment growers because it is convenient for cooking and the ambient temperature is usually stable (65–75°F, which herbs love). Avoid placing your garden near a drafty window — even though you do not need the sunlight, cold drafts can slow growth.
Step 2: Set Up Your Lighting
If using a smart garden system: This is automatic. The system has a built-in LED panel at the correct height and spectrum. Just plug it in and set the light schedule to 14–16 hours per day (most systems default to this).
If using a DIY LED grow light: Mount the light so it is 8–12 inches above the tops of your seedlings. For newly planted seeds, you can start at 6 inches and raise the light as plants grow. Set a timer for 14 hours on, 10 hours off. Consistency matters more than the exact hours — herbs do best with a predictable light cycle.
Step 3: Prepare Your Growing Medium
For smart garden systems: Insert the pre-seeded pods into the system. Fill the water reservoir with clean, room-temperature water. Add nutrients according to the manufacturer’s instructions (usually a capful of liquid nutrient solution). That is it.
For DIY soil growing: Use a high-quality potting mix with good drainage. I recommend a mix designed for containers (often labeled “potting mix” rather than “garden soil”). Fill 4-inch pots with the mix, leaving about half an inch of space at the top. Plant seeds at the depth indicated on the seed packet (usually 1/4 inch for most herbs). Water gently until the soil is moist but not waterlogged.
For DIY hydroponic growing: Use rockwool cubes or peat pellets as your growing medium. Soak them in pH-adjusted water (5.5–6.5) for 30 minutes before use. Plant seeds in the pre-drilled holes. Place the cubes in a net pot or hydroponic tray over a nutrient solution reservoir.
Step 4: Plant Your Seeds or Seedlings
You can start herbs from seed or buy small starter plants from a garden center. Seeds are cheaper and give you more variety, but starter plants get you to harvest faster. Here is my recommendation:
- Start from seed: basil, cilantro, parsley, chives, dill
- Start from cuttings or starter plants: rosemary, thyme, oregano, mint (mint cuttings root very easily in water)
For seeds, plant 2–3 seeds per pod or pot and thin to the strongest seedling after germination. This improves your success rate significantly.
Step 5: Establish a Watering and Nutrient Schedule
Watering is where most indoor herb growers go wrong. Here is what works for me:
- Smart garden systems: Check the water level once a week and top up as needed. Add liquid nutrients every 2 weeks (or follow the app’s reminders). The system handles the rest.
- DIY soil growing: Water when the top inch of soil feels dry to the touch. For most herbs in a 4-inch pot under grow lights, this is every 2–3 days. Water thoroughly until it drains from the bottom, then let the pot drain completely. Never let herbs sit in standing water.
- DIY hydroponic: Check the reservoir level weekly and top up with pH-adjusted nutrient solution. Change the entire reservoir every 2–3 weeks to prevent salt buildup and algae growth.
For soil-grown herbs, feed with a diluted liquid fertilizer (half the recommended strength) every 2 weeks. Herbs do not need heavy feeding — too much nitrogen produces lots of leaves but less flavor.
Step 6: Monitor, Prune, and Harvest
Once your herbs are growing, the main tasks are pruning and harvesting. Regular pruning actually makes herbs bushier and more productive — it is not optional if you want good yields.
- Basil: Pinch off the top set of leaves once the plant has 4–6 sets of true leaves. This encourages branching. Always pinch just above a leaf node. Remove any flower buds immediately — flowering makes basil taste bitter.
- Mint: Trim regularly from the top to prevent it from becoming leggy. Mint is aggressive and will need frequent pruning in a multi-plant setup.
- Parsley: Harvest outer stems first, cutting near the base. The plant will produce new growth from the center.
- Cilantro: Harvest outer leaves as needed. When the plant starts to bolt (send up a central flower stalk), harvest the entire plant and start a new batch.
- Chives: Cut leaves about 2 inches above the base. They will regrow quickly.
Harvest Timeline: When to Expect Results
One of the most common questions I get is: how long does it take to grow herbs indoors without sunlight? Here is a realistic timeline based on my experience growing from seed under LED grow lights.
| Herb | Germination | First Harvest | Full Production | Lifespan Indoors |
|---|---|---|---|---|
| Basil | 4–7 days | 21–28 days | 6–8 weeks | 4–6 months |
| Mint | 10–15 days | 30–40 days | 8–10 weeks | 12+ months |
| Chives | 7–14 days | 40–50 days | 10–12 weeks | 12+ months |
| Parsley | 10–21 days | 45–60 days | 10–12 weeks | 6–9 months |
| Cilantro | 7–10 days | 30–40 days | 5–6 weeks | 6–8 weeks (then bolt) |
| Oregano | 10–14 days | 55–70 days | 12–14 weeks | 12+ months |
| Rosemary | 15–25 days | 70–90 days | 14–16 weeks | 2+ years |
| Thyme | 14–21 days | 60–75 days | 12–14 weeks | 12+ months |
These timelines assume 14–16 hours of full-spectrum LED light per day and stable room temperatures (65–75°F). If you are using a smart garden system like the AeroGarden Bounty Elite, you can expect the faster end of each range due to optimized lighting and automated nutrient delivery.
Complete Cost Breakdown: Growing Herbs Indoors
One of the best things about growing your own herbs is the cost savings. Fresh herbs at the grocery store typically cost $2–$4 per small bunch or clamshell, and they spoil within a week. Here is what it costs to grow them yourself indoors without sunlight.
DIY Grow Light Setup
| Item | One-Time Cost | Monthly Ongoing |
|---|---|---|
| LED grow light (24W full-spectrum) | $35 | — |
| Adjustable light stand or gooseneck | $20 | — |
| 4–6 pots (4-inch ceramic or plastic) | $15 | — |
| Potting mix (bag) | $10 | $2 |
| Seeds (variety pack) | $12 | $3 |
| Liquid fertilizer | $8 | $2 |
| Outlet timer | $10 | — |
| Electricity (24W light, 14 hrs/day) | — | $1.50 |
| Total | $110 | $8.50 |
Smart Garden System Setup
| Item | One-Time Cost | Monthly Ongoing |
|---|---|---|
| Smart garden system (e.g., Click & Grow Smart Garden 9) | $199 | — |
| Replacement seed pods (9 every 2–3 months) | Included initially | $12 |
| Liquid nutrients | Included initially | $4 |
| Electricity | — | $1.50 |
| Total | $199 | $17.50 |
For comparison, buying fresh basil, parsley, mint, and cilantro at the grocery store weekly costs me about $12–$16 per month. Both indoor growing approaches pay for themselves within a few months, and the quality of home-grown herbs is noticeably superior — more aromatic, more flavorful, and always fresh when you need them.
7 Common Mistakes When Growing Herbs Indoors Without Sunlight
I made all of these mistakes in my first year of indoor herb growing. Learning from them upfront will save you weeks of frustration.
Mistake 1: Not Enough Light Hours
Herbs need a minimum of 12 hours of light per day, and 14–16 hours is better. The most common beginner mistake is running the grow light for only 8 hours, treating it like a work day. Your herbs are not on a 9-to-5 schedule. Use a timer and give them a full 14 hours minimum.
Mistake 2: Light Too Far From Plants
LED grow lights lose intensity rapidly with distance. If your light is more than 12 inches from the plant tops, growth will be slow and leggy. Keep the light 6–12 inches above the canopy and adjust as plants grow. If your plants are stretching toward the light with long, thin stems, the light is too far away.
Mistake 3: Overwatering
This is the number one killer of indoor herbs. Most herbs prefer slightly dry conditions. Constantly wet soil leads to root rot, which shows up as yellowing leaves and wilting despite moist soil. The fix is simple: check soil moisture before watering. If the top inch is still damp, wait another day.
Mistake 4: Ignoring Air Circulation
Indoor herbs need some air movement to prevent fungal diseases like powdery mildew, especially rosemary and thyme. The Iowa State University Extension highlights that good air circulation and avoiding overly wet foliage are key to preventing fungal problems on indoor herbs. A small USB fan running on low for a few hours a day makes a big difference. I keep a tiny desk fan pointed at my herb garden and have not had a fungal issue since.
Mistake 5: Not Pruning Enough
Beginners are often afraid to cut their herbs, worried about damaging them. The opposite is true: regular pruning makes herbs bushier, more productive, and longer-lived. An unpruned basil plant will grow tall and spindly, flower early, and die within a few months. A regularly pruned basil plant stays bushy and productive for 4–6 months.
Mistake 6: Using the Wrong Nutrients
Herbs are not heavy feeders. Using full-strength fertilizer (or fertilizer formulated for vegetables and flowers) can burn roots and produce excessive leafy growth with weak flavor. Use a balanced liquid fertilizer at half strength, and feed only every 2 weeks. Less is more with herbs.
Mistake 7: Expecting supermarket-size Harvests Immediately
Your first harvest will be small — maybe a tablespoon of basil leaves or a few sprigs of parsley. That is normal. The plant needs time to establish a root system and produce enough foliage to sustain regular picking. By week 8–10, most herbs are producing enough for regular cooking use. By week 12, you will likely have more herbs than you can use fresh.
Advanced Tips for Better Indoor Herb Harvests
Once you have the basics down, these tips will help you get more from your indoor herb garden.
- Succession planting for cilantro: Cilantro bolts quickly indoors. Plant a new batch of seeds every 3–4 weeks in a separate pot to ensure a continuous supply. When one batch bolts, the next is ready to harvest.
- Rotate your plants: If you are growing under a single light source, rotate pots every few days so all sides of the plant receive equal light. This prevents leaning and promotes even growth.
- Use a humidity tray: Indoor air is often dry, especially in winter with heating. Place a shallow tray of pebbles and water near your herbs to raise local humidity slightly. This is especially helpful for basil and mint.
- Save your trimmings: When you prune basil or mint, do not throw away the cuttings. Strip the lower leaves and place the stems in a glass of water. They will root in 1–2 weeks, giving you free new plants.
- Dry or freeze excess herbs: When your herbs are producing faster than you can use them, harvest a big batch and either air-dry them (hang upside down in a paper bag) or freeze them in ice cube trays with olive oil. Both methods preserve the flavor for months.
Frequently Asked Questions
Can herbs really grow without any sunlight at all?
Yes, absolutely. Modern full-spectrum LED grow lights provide everything herbs need for photosynthesis. In fact, many commercial herb growers use exclusively artificial light because it provides more consistent and controllable results than natural sunlight. I have been growing herbs in my north-facing, ground-floor apartment for over two years with zero natural light and the results are excellent.
How much does it cost to run grow lights for herbs?
Very little. A 24-watt LED grow light running 14 hours per day uses about 10 kWh per month, which costs roughly $1.50 in most areas. Even a larger 50-watt panel (suitable for a bigger herb garden) costs about $3 per month. Grow lights are one of the cheapest inputs in indoor gardening.
Should I use soil or hydroponics for indoor herbs?
Both work well. Soil is more forgiving of mistakes (overwatering, nutrient errors) and feels more familiar for gardeners transitioning indoors. Hydroponics (including smart garden systems) typically produces faster growth and cleaner results with no soil mess. For beginners, I usually recommend starting with a smart garden system or simple soil pots with a grow light, then experimenting with DIY hydroponics once you have the basics down.
Why are my indoor herbs turning yellow?
Yellowing leaves on indoor herbs are usually caused by one of three things: overwatering (most common), nutrient deficiency, or insufficient light. Check your soil moisture first — if it is consistently wet, reduce watering. If the soil seems fine, try increasing your fertilizer frequency slightly (still at half strength). If your light is more than 12 inches from the plant tops, move it closer.
Do I need to pollinate herbs grown indoors?
For leafy herbs like basil, parsley, mint, cilantro, and chives, you do not need pollination because you are harvesting the leaves, not the fruit. Pollination only matters if you are growing herbs for their seeds (like coriander seed from cilantro) or if you are growing fruiting plants like tomatoes or peppers. For those, a gentle shake of the flowers or a small brush is sufficient for indoor pollination.
Final Thoughts: Start Growing Today
Learning to grow herbs indoors without sunlight was one of the most rewarding things I have done for my apartment lifestyle. There is something deeply satisfying about snipping fresh basil for pasta or fresh mint for tea from a plant you grew yourself, right there in your kitchen, regardless of the weather or the season outside.
The barrier to entry is lower than you think. A $35 LED grow light, some pots, potting mix, and a packet of basil seeds is all you need to start. Total investment: about $60 and 10 minutes of setup. Your first harvest will come in about three weeks, and from there, you will have fresh herbs on demand for months.
If you want to skip the DIY approach and get a fully automated experience, a smart garden system like the Click & Grow Smart Garden 9 or LetPot Max makes it practically foolproof. Pop in the pods, fill the water, plug it in, and wait for the notifications to start rolling in.
And if you are trying to decide between the top systems, my Gardyn vs. AeroGarden comparison breaks down the two most popular options in detail.
Whatever path you choose, the most important thing is to start. Plant some basil this weekend, and in 21 days, you will wonder why you ever bought those sad plastic clamshells at the grocery store.
Have a question about growing herbs indoors? Drop me a message — I love hearing from fellow apartment growers. And if you want to know more about my testing process and background, check out the About page.